
Surgeons and military leaders use checklists to ensure consistently high levels of quality in mission-critical work. So why don’t we use them more in software?
We can. And should. Here’s how –
In my job at JetBridge, I work with some of the most experienced software development managers and some of the most demanding enterprise clients around the World. Over the years I’ve developed a checklist for releasing new website builds that will save you time and potential embarrassment. Use this consistently and your coworkers and managers will think you’re a “rock star.”
But before we jump into the checklist I assume that you have done all the development work in terms of the website functionality and its content, you have reviewed all the pages yourself or with the client and your next big step is releasing it to the world.
Checklist:
1. Set up a staging environment
Whether you want to test a new feature on the website, show it to the client, or run performance tests, you should have a staging environment set up. A stage environment is an environment for testing that exactly resembles a production environment.
2. Set up monitoring
Whether your hosting provider drops the ball or you accidentally publish a change that breaks one of your pages or the whole website, setting up an uptime monitoring tool will help you get notified about the issue by Text/Email/Slack message in a timely fashion. Some popular services include: sentry.io, uptimerobot.com, statuscake.com.
3. Compress images
To optimize website load time and improve its SEO, optimize the images used on the website. The primary goal of formatting your images is to find the balance between the lowest file size and acceptable quality. You can use tools like imageoptim.com for the optimization of your images.
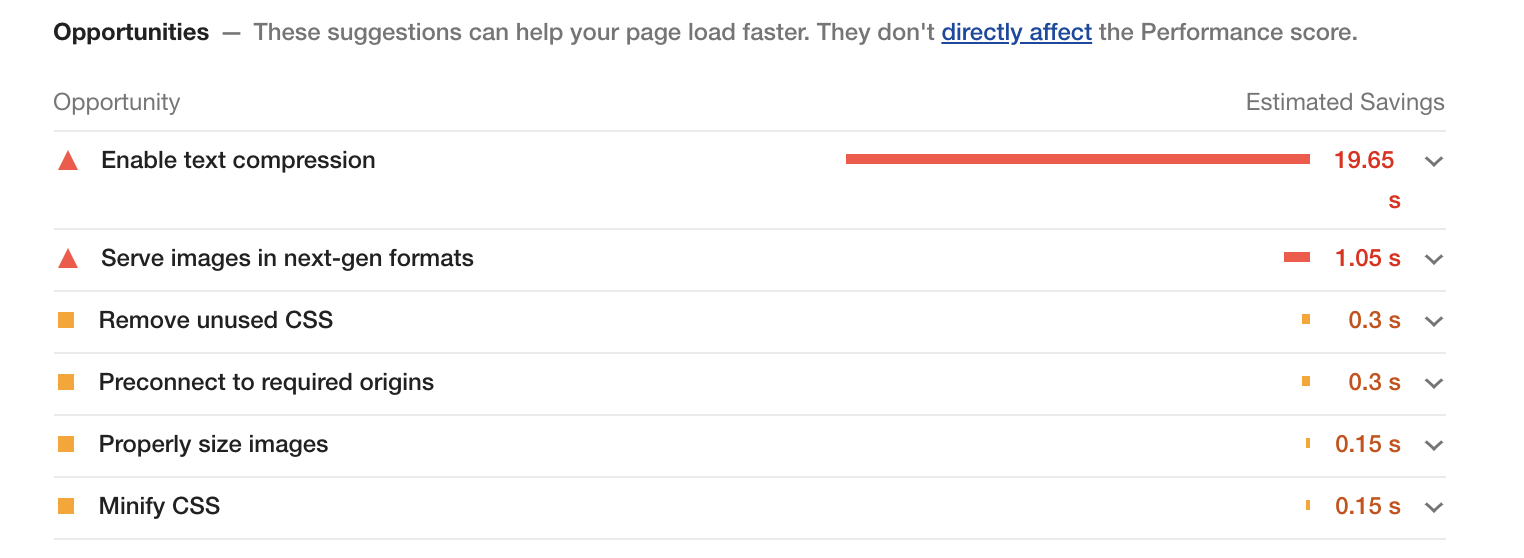
4. Run the Google Lighthouse test and address reported issues
Lighthouse from Google is a tool that audits load times, accessibility and search engine optimization of web pages. It includes the ability to test progressive web applications for compliance with standards and best practices. Make sure to run the Lighthouse on a deployed environment (dev/stage) and not only locally.
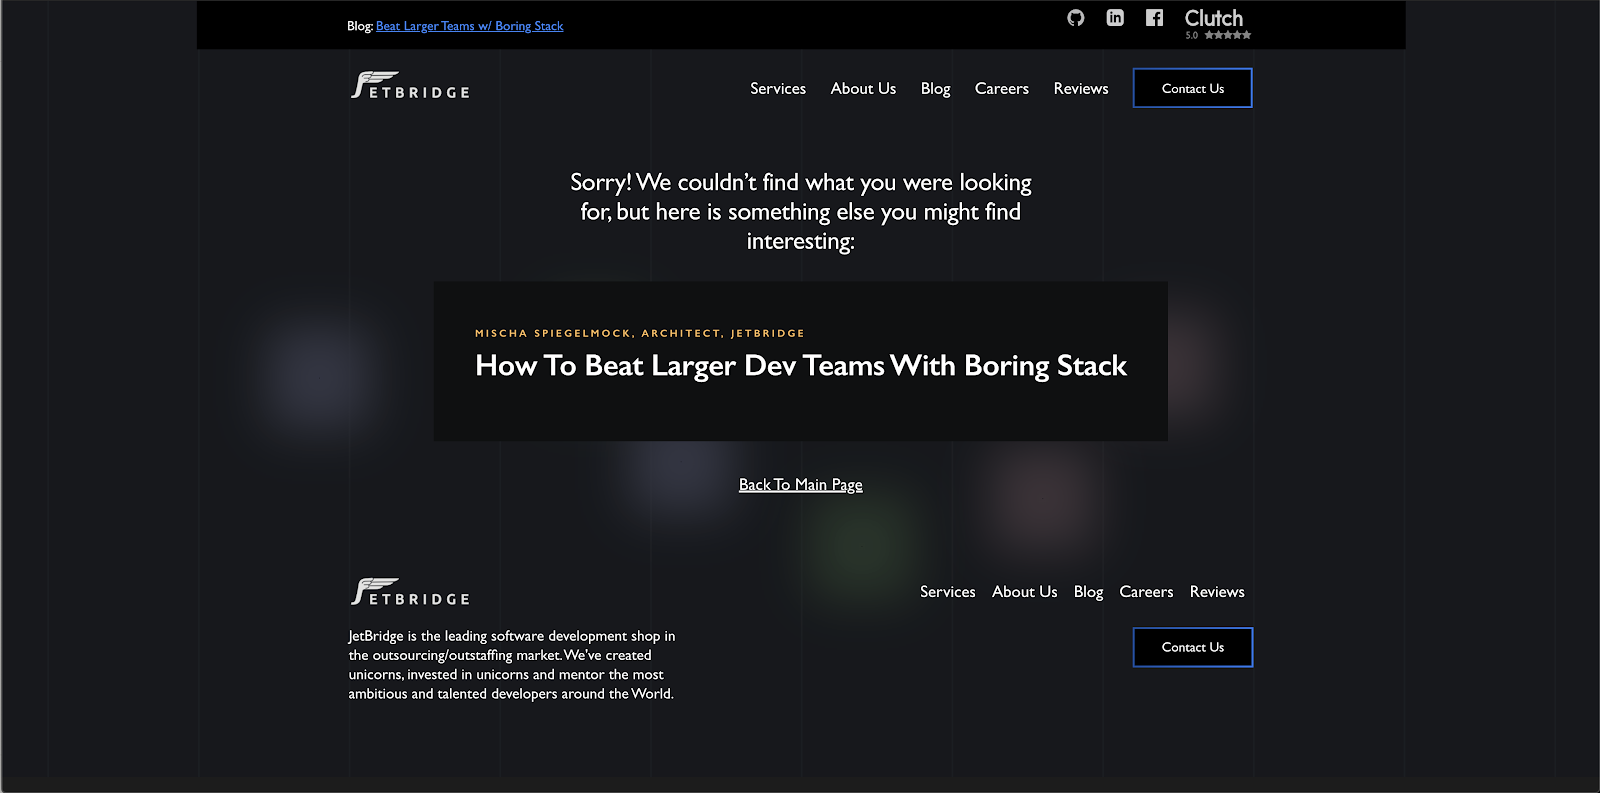
5. Set up a 404 page
What happens if the user goes to a non-existing page accidentally or because of a broken link? Will the user see this unfriendly message?

Take some time to design a nice 404 page that will allow the user to go the main page of the website:
6. Set up a favicon
Favicon helps your website appear more professional and credible and can be found among all the other tabs more easily.
To add a favicon you can create a .png image and then use one of the following snippets between the <head> tags of your static HTML documents:
<link rel="icon" type="image/png" href="/favicon.png" />
7. Set up Meta Titles, Meta Description and Social Preview Links
Titles help search engines to serve the right results to the user. Moreover, they display the page title to the users in search results so that they can determine whether the page is something they are looking for. As with the favicon, page titles help the user navigate through the open tabs.
Meta description displays the description of your page in search results and while sharing your page on social media.
To add meta tags, describe metadata within HTML document:
<head>
  <title>HTML Elements Reference</title>
  <meta name="description" content="Free Web tutorials">
</head>
Setting up Social Preview links:
Facebook uses <meta> tags leveraging the Open Graph protocol, a classification system for web pages that extends beyond those <meta> tags already defined in HTML5. A complete list of <meta> tags available can be found at the Open Graph Web site. There are so many from which to choose that it can be somewhat intimidating, but only four are actually required:
<meta property="og:title" content="European Travel Destinations">

<meta property="og:description" content="Offering tour packages for individuals or groups.">

<meta property="og:image" content="<http://euro-travel-example.com/thumbnail.jpg>">

<meta property="og:url" content="<http://euro-travel-example.com/index.htm>"
Twitter has its own <meta> tags that are similar to the Open Graph protocol, but uses the “twitter” prefix instead of “og”. As with Facebook, only a few are required:
<meta name="twitter:title" content="European Travel Destinations ">

<meta name="twitter:description" content=" Offering tour packages for individuals or groups.">

<meta name="twitter:image" content=" <http://euro-travel-example.com/thumbnail.jpg>">

<meta name="twitter:card" content="summary_large_image">
8. Create a robots.txt file
robots.txt contains instructions for search engine crawlers regarding the pages that are allowed to be crawled. It’s useful if you want to exclude certain pages from crawling. The presence of the robots.txt file positively influences your SEO. You should put your robots.txt at the root of the website host to which it applies. More about robots.txt: https://moz.com/learn/seo/robotstxt
9. Set up XML sitemaps/HTML sitemap
A sitemap is a file where you provide information about the pages, videos, and other files on your site, and the relationships between them. Search engines like Google read this file to more intelligently crawl your site. A sitemap tells Google which pages and files you think are important in your site, and also provides valuable information about these files: for example, for pages, when the page was last updated, how often the page is changed, and any alternate language versions of a page.
Guide on building and submitting a sitemap: https://support.google.com/webmasters/answer/183668?hl=en
10. Configure active environment variables for the production build
Make sure that you have configured the environment variables (payment service provider publishable keys, backend endpoint URL, etc.) for your build. Remember to never store any secret keys on GitHub due to security reasons. You can use a library like dotenv package to configure you environment variables.
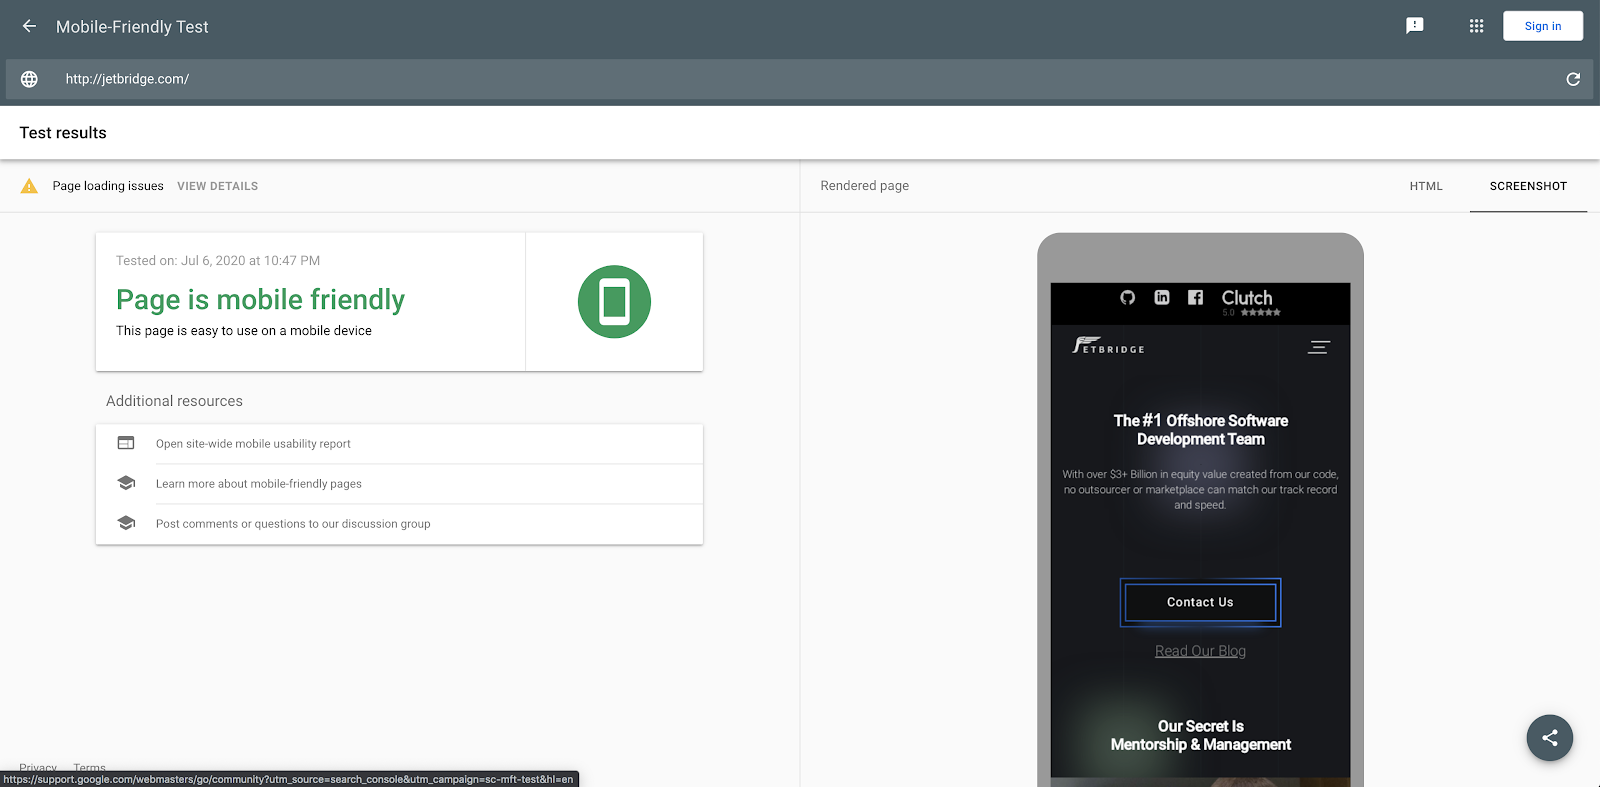
11. Test the website in different browsers, ensuring responsive design on varied devices
Use a staging environment that you’ve set up to do testing on different devices. Make sure that all the functionality of your website is working, make sure you don’t have broken links. Keep in mind that your pages may behave differently on mobile as the interaction on mobile devices is done using touches (not clicks).
You can use a test from Google to test if a particular page is mobile-friendly: https://search.google.com/test/mobile-friendly
I strongly recommend you to use real mobile devices to test the website interactivity instead of just using browsers’ developer tools.
12. Set-up a domain/transfer a domain to your hosting provider/set the nameservers to point to your hosting provider
If your domain registrar is different from your hosting provider – you will have to perform a domain transfer. Migrating a domain to AWS Route53:
https://docs.aws.amazon.com/Route53/latest/DeveloperGuide/domain-transfer-to-route-53.html
Alternatively, instead of transferring the domain, you can make your hosting provider the DNS service for a domain that’s in use. Instructions on Making Route 53 the DNS service for a domain that’s in use for AWS:
https://docs.aws.amazon.com/Route53/latest/DeveloperGuide/migrate-dns-domain-in-use.html
13. Set up a CDN (Content Delivery Network)
A CDN is a really fast way to deliver static content from your website or mobile application to people with regional caching. A CDN is made up of a network of servers (“points of presence” or POPs) in locations all over the world.
Setting up CDN using
AWS Cloudfront (S3): https://aws.amazon.com/cloudfront/getting-started/S3/
14. Set Up an SSL certificate
An SSL certificate encrypts the data that goes from a user’s computer to the target website and back. Every time a user enters information into your site, SSL makes sure it can securely travel from their browser to your web server.
Installing SSL on Cloudfront: https://aws.amazon.com/premiumsupport/knowledge-center/install-ssl-cloudfront/
Getting an SSL certificate on Letsencrypt: https://letsencrypt.org/getting-started/
15. Configure payment processing
If your website accepts payments, you should have a Payment Service Provider configured on your website. Make sure to set up publishable keys for your PSP before deploying the website to production.
16. Link to the terms of service and privacy policy on your website
There are several reasons for having a privacy policy, including that it is a legal requirement – you can be fined if you don’t have one. In addition, having a privacy policy also helps with SEO.
While a Terms and Conditions agreement is recommended to have for your website, it’s not required by law to have this agreement. This agreement sets the rules that users must agree to in order to use your website. Some reasons for having terms of use: prevent abuses, own your Content, terminate accounts, limit liability, set the governing law. If your company or your client doesn’t have a dedicated lawyer to prepare these documents, you can look for Privacy Policy and Terms and Conditions generators on the Internet (make sure to review and edit them to suit your service).
You may want to extend this list with other items specific to the industry you work in or business processes of your company. Happy shipping 🚢!